How To Remove A La Pavoni Power Cable Compression Gland
Published on 2026-02-27
AI Breakdown
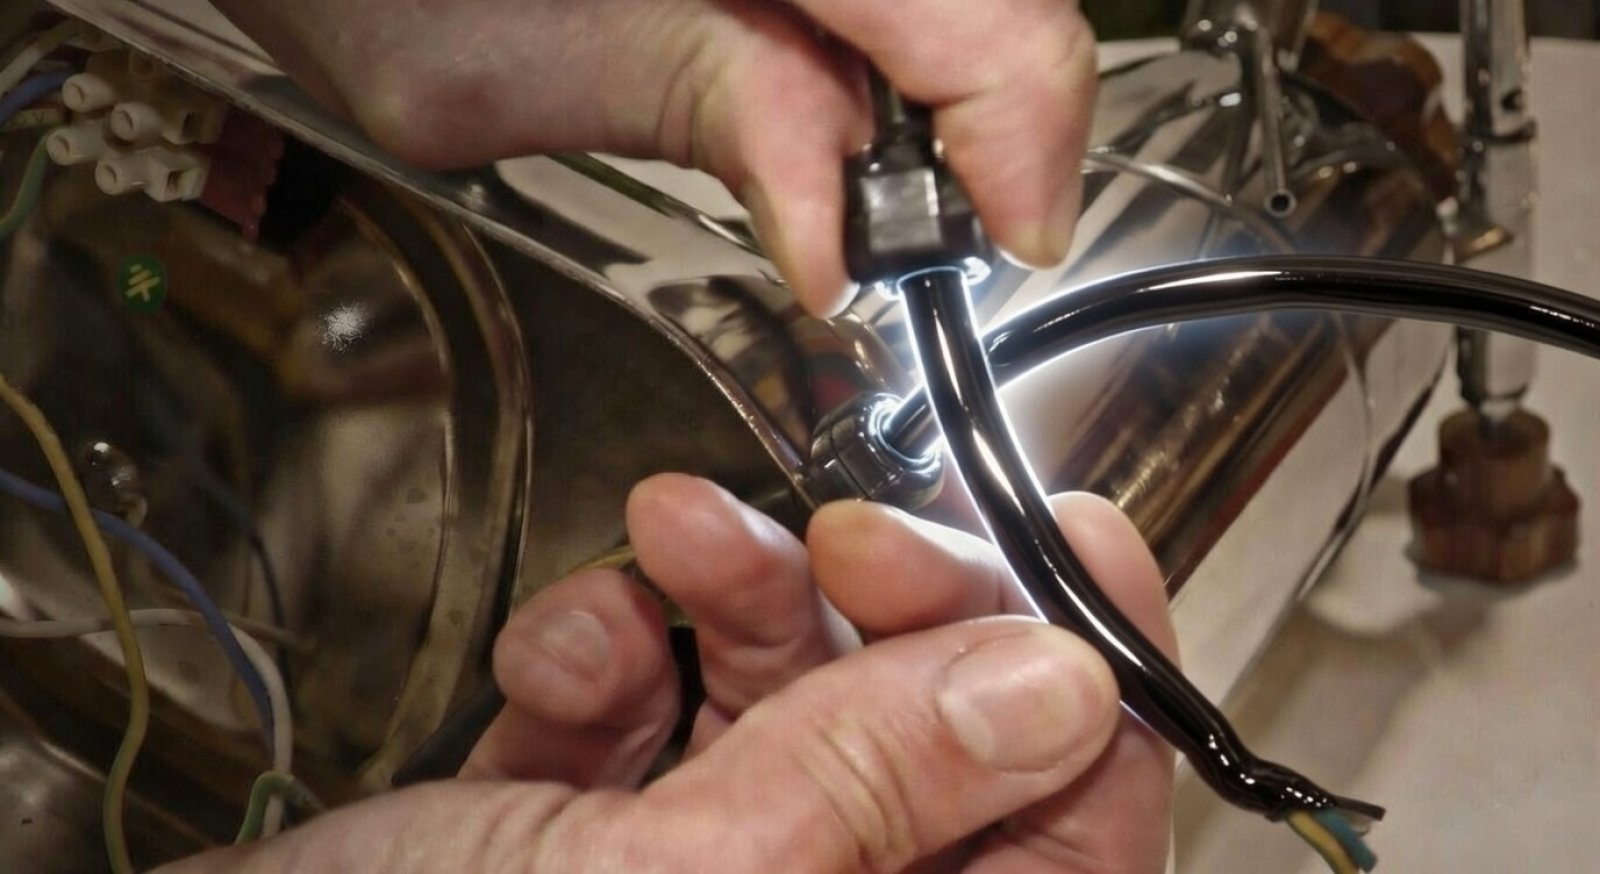
Many La Pavoni lever machines use a simple plastic compression gland to secure the mains cable where it enters the base. Unlike threaded cable glands, this design has no nut or retaining hardware. It is a single molded plastic piece that stays in place purely through pressure.
This guide explains how the gland works and how to safely remove and reinstall it without damaging the cable or the machine.
How the Compression Gland Works
The gland holds itself in the hole through expansion pressure. When the cable passes through the center, the plastic compresses around the wire and expands outward, locking itself tightly into the base opening.
This compression keeps the cable firmly in place but also makes the gland difficult to remove.
Tools Required
- Pipe wrench or adjustable pliers
- Optional: protective tape or padding for the tool jaws
If you want to avoid scratching the plastic, you can protect the contact points of the tool. However, avoid wrapping the entire piece in cloth, as you still need to clearly see what you are doing.
Removing the Gland
The removal process is based on compressing the plastic so it becomes narrow enough to slide out of the mounting hole.
- Grip the gland gently with a pipe wrench or pliers.
- Squeeze the plastic so the outer section compresses inward.
- Continue applying pressure while slowly pulling the gland outward.
- Be patient, as one side may catch on the edge of the hole during removal.
- Once halfway out, the gland will stop expanding and can be fully removed.
When released, the plastic will expand back to its original shape.
Reinstalling the Gland
To reinstall the gland:
- Insert the inner section into the hole first.
- Compress the outer section again.
- Push it back into position until it snaps into place.
The plastic will expand and lock itself securely in the hole.
A Useful Installation Trick
A new cable can make installation difficult because the gland naturally opens wide around it.
Before installing it in the machine:
- Pre-compress the gland around the cable outside the machine
- Pinch it firmly so the plastic holds its compressed shape
This makes it much easier to insert into the mounting hole.
Avoid Repeated Adjustments
Once you install the cable gland, try to position it correctly on the first attempt. Repeated adjustments can leave visible bends or marks in the cable insulation outside the machine.
With a bit of patience, the entire process is quick and straightforward.